In the infamous words of Tenacious D, "I love ya baby, but all I can think about is Kielbasa sausage."
Kiełbasa is a Polish term that just means "sausage", and in Poland there are hundreds of different styles of Kielbasa. In English, however, Kielbasa refers to a particular style of Polish sausage.
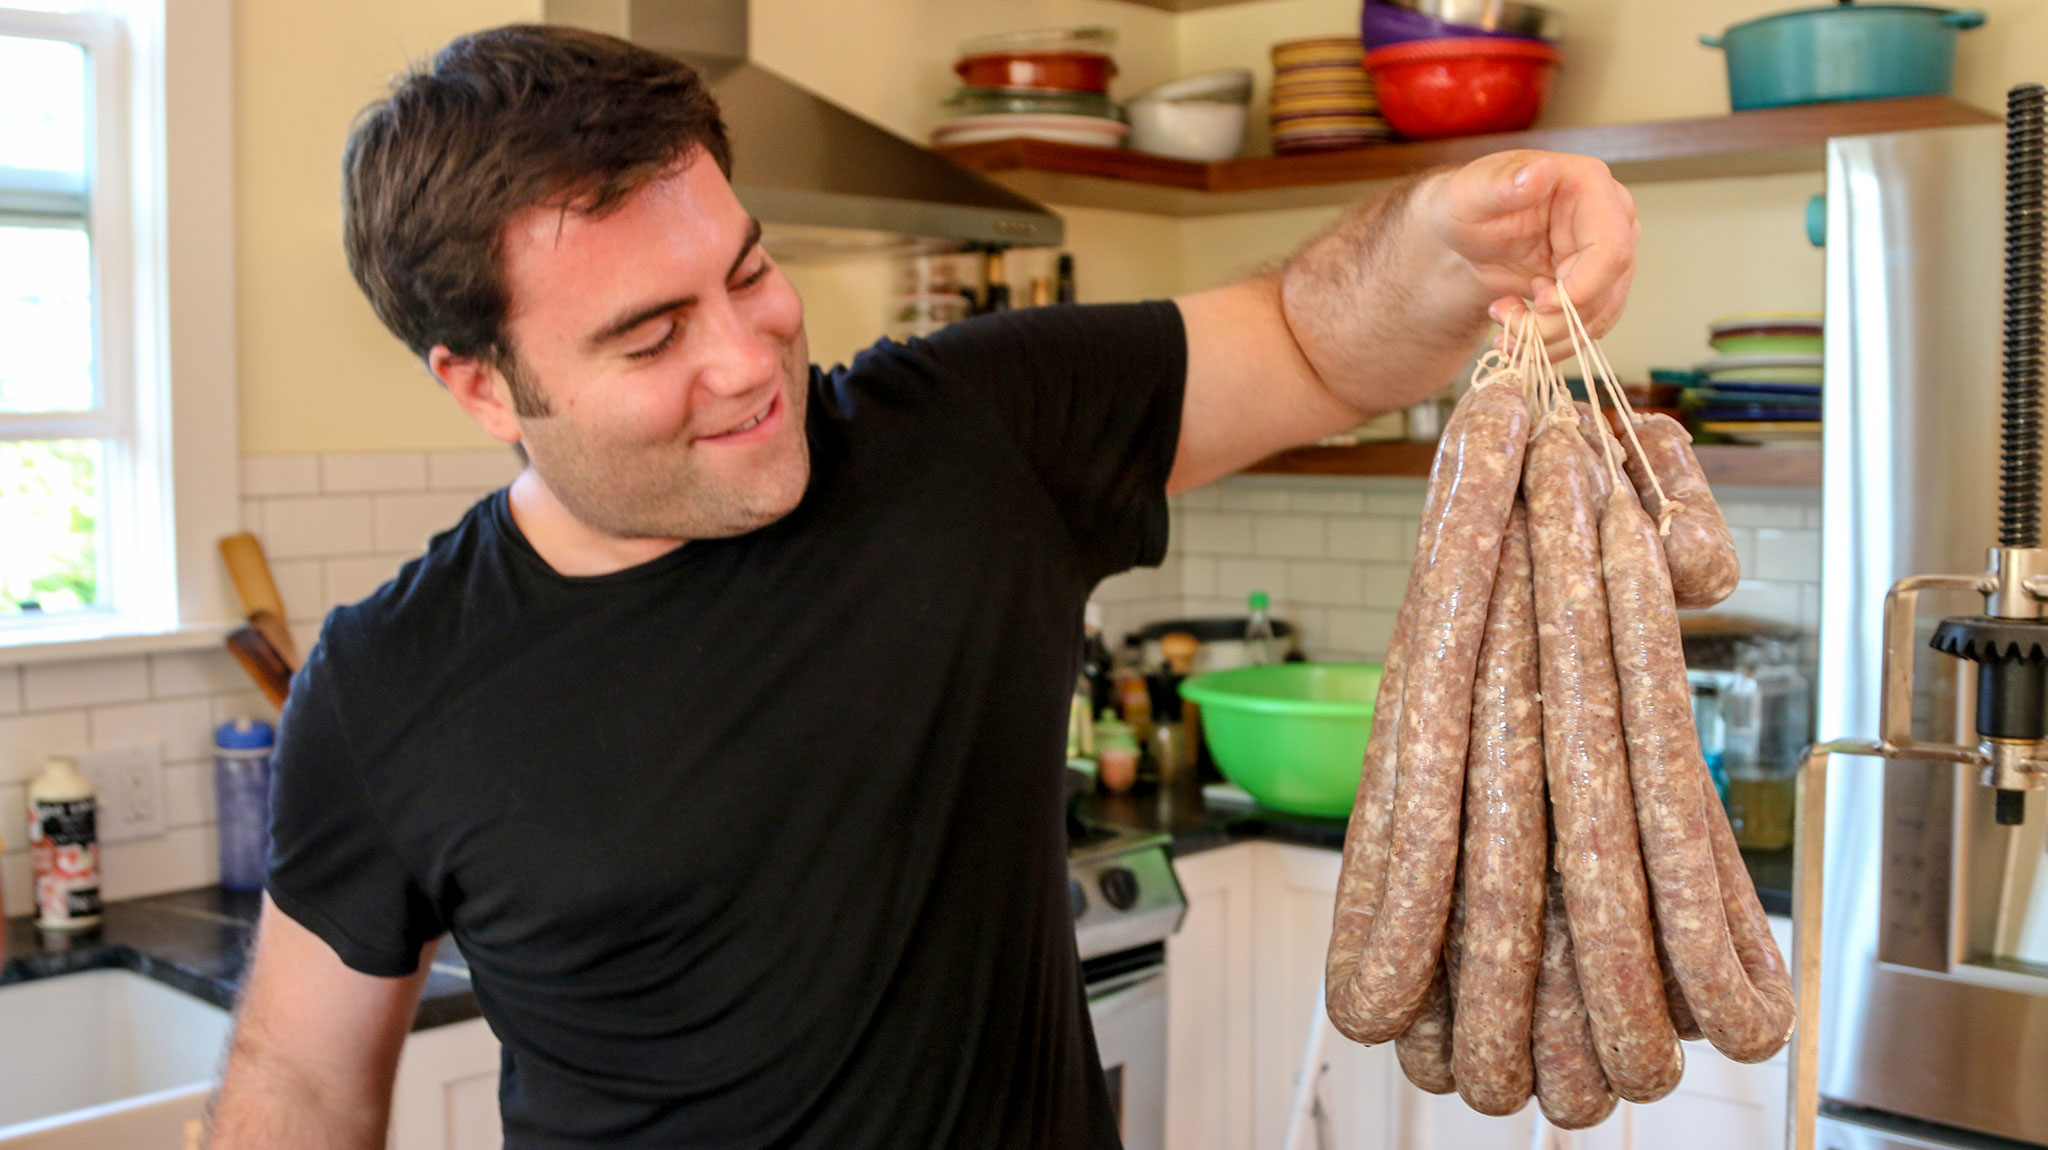
The recipe we're featuring here is for Kiełbasa Wiejska - a garlic- and marjoram-laden pork and beef sausage. It is a sausage that is typically made in rural Poland, and is tied together at the ends using butcher twine to form a U-shape before smoking.
Day 1: 3 hours
Day 2: 3 hours
10 pounds
• Butcher Twine
• Meat Grinder
• Mesquite Wood Chips
• Sausage Stuffer
• Smoker
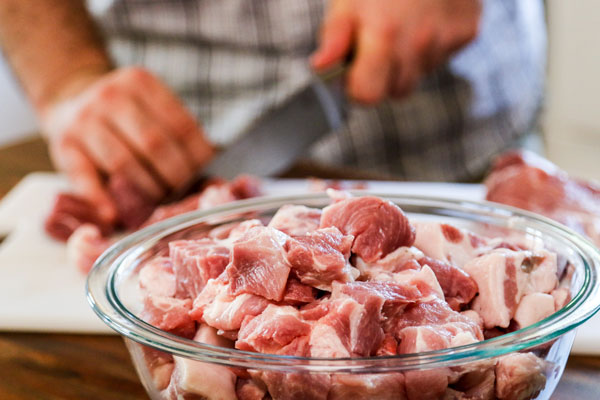
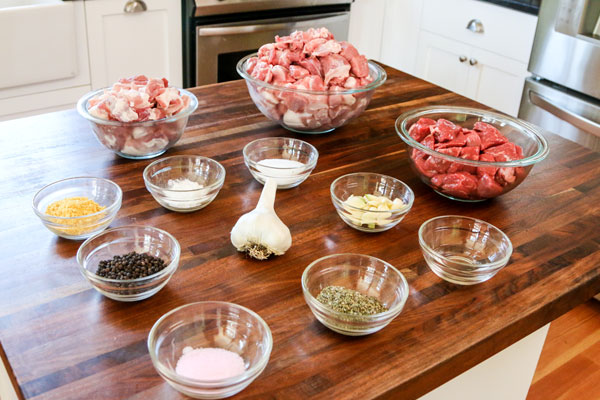
• 6 lbs. pork shoulder
• 2 lbs. pork belly
• 2 lbs. chuck roast or stew beef
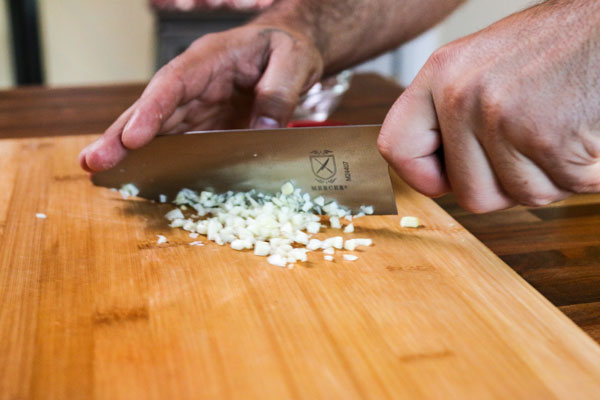
• 1 head garlic
• 2 tsp. instacure no. 1 curing salt
• ¼ cup kosher salt
• ¼ cup ground dry Mustard
• 2 tbsp. dried marjoram
• 2 tbsp. black peppercorns
• 1 ½ tbsp. dextrose
• 1 ½ cups cold water
For Stuffing:
• 4 cups water
• 2 tbsp. white wine vinegar
• 20 ft. hog casing
For Smoking:
• 5 lbs. crushed ice
If you're buying the meat pre-ground from the butcher, ask them to coarsely grind the meat.
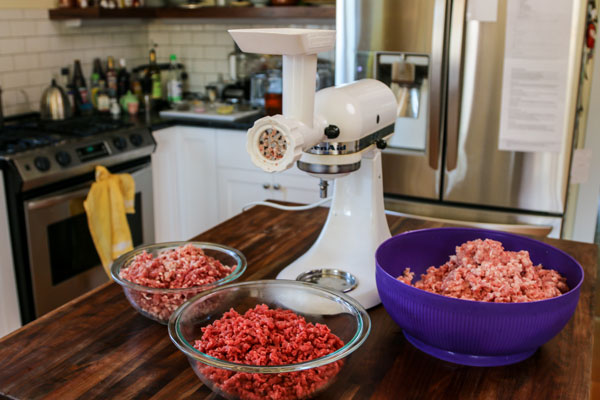
Place 3 large mixing bowls and the meat grinder attachment in the freezer around 15 minutes before use. Keeping the equipment cold will help the grinding move quickly.
Measure out 1 ½ cups of water; place in the refrigerator to chill it before use. Measure out the remaining ingredients of your shopping list, so that they are ready to work with in the subsequent steps.
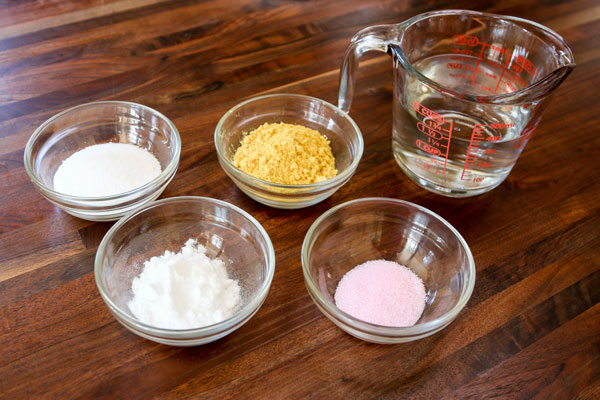
Add 2 tbsp. water to the Mustard powder and mix together to create a slurry. This will help remove the clumps from the powder.
Pour the salts, dextrose, and mustard slurry into the remaining 1 ½ cups cold water, and stir for 30 seconds they have dissolved. Mustard needs to sit in the water for at least 10 minutes to ensure the flavors from the mustard oils are fully expressed.
Place the mustard / salt mixture back in the refrigerator to keep it cold.
Add the spices into the Mustard / salt mixture; whisk until the spice clumps have been dissolved.
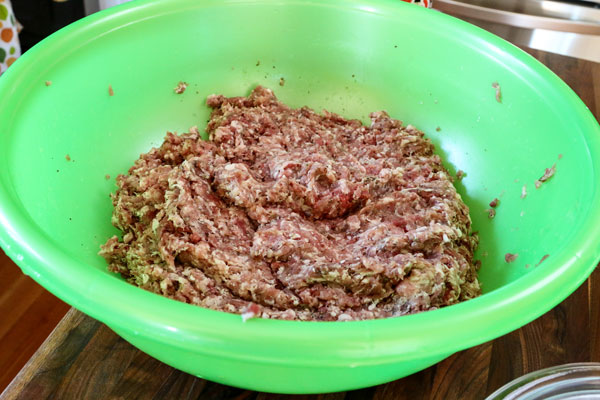
Wearing food preparation gloves, mix the spice mixture into the ground meats until it is well integrated.
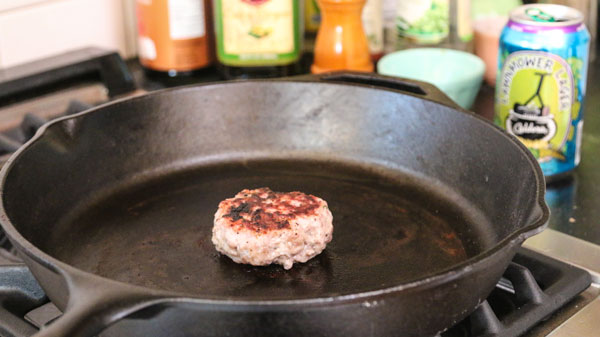
Reserve a patty-size portion of meat for the taste test. Place the remaining meat in the freezer until stuffing the meat into casing.
Prepare the sausage stuffer.
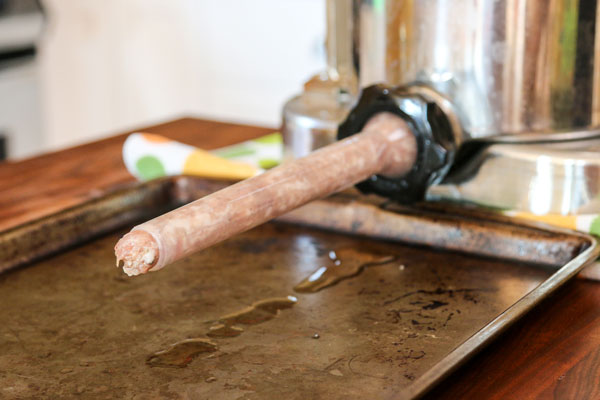
Press the meat through the stuffer until the ground meat just barely pokes through the end of the spout.
Push the open end of the hog casing over the end of the stuffer, and continue to push the casing onto the stuffer until you reach the end of the casing. Tie a knot at the end of the casing.
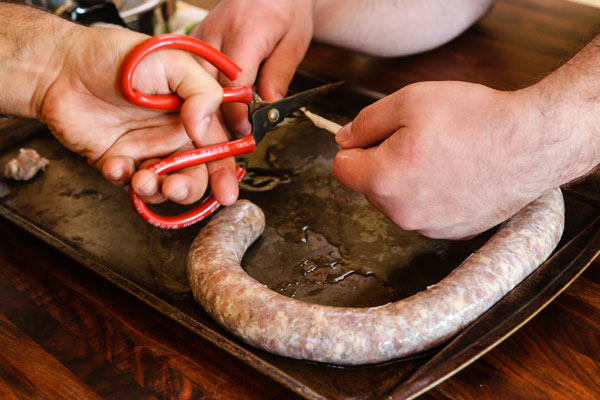
Stuff the sausage into the casing until it reaches around 18 inches in length. Once you reach this length, halt the stuffing process, pull the casing away from the stuffer about 1 inch, and cut the casing to separate this sausage link.
Tie the loose end of casing and push the remaining casing back over the stuffer.
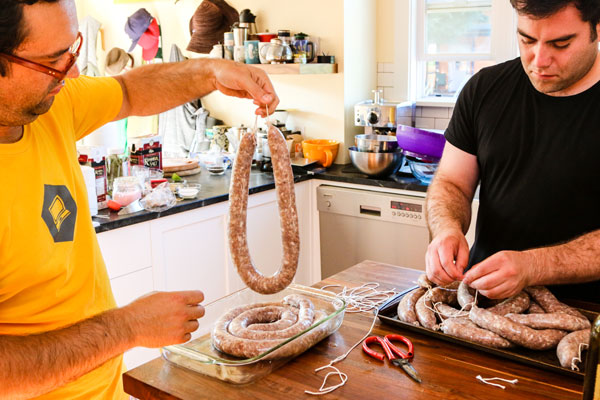
For the individual sausage links, tie a knot in the open end of the casing of each link. Tie butcher twine around the knots at each end of the sausage link, leaving roughly 4 inches of twine between the ends of the Kielbasas.
You can use the butcher twine to hang the sausages inside your smoker, if you wish.
Now, we need to dry out the sausage's external casing to form a pellicle. This will provide a tacky surface to which the smoke will adhere during the smoking process, and will also serve as a way for the Kielbasa to retain its internal moisture.
Place a cooling rack over each of the rimmed baking sheets to catch any drippings. Put the sausages on the cooling racks. Place uncovered in the refrigerator overnight.
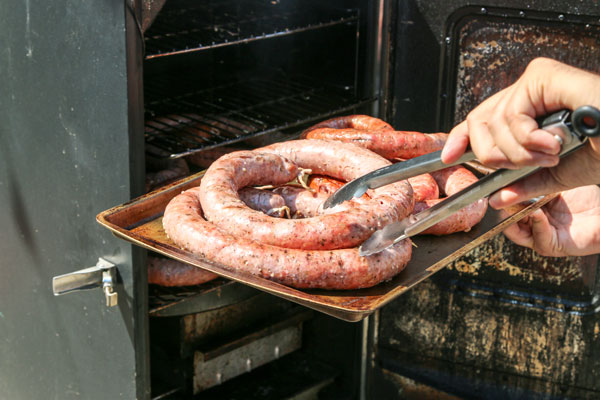
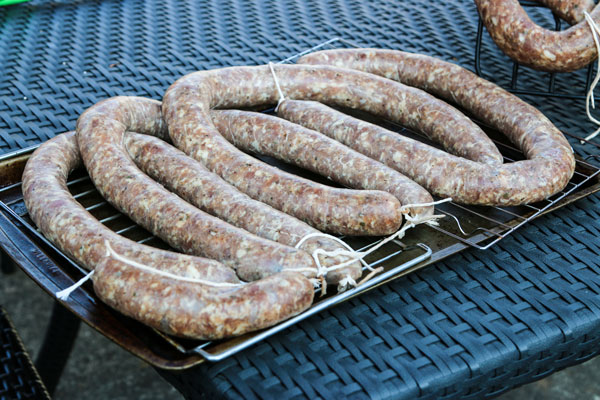
The next day, when the pellicle has formed, the Kielbasas are ready to be smoked.
Heat your smoker to a temperature of 180°F / 82°C. Add mesquite wood chips and smoke until they reach an internal temperature of 150°F / 65°C. This will take roughly 1 hour, depending on your smoker.
When finished, remove and place in an ice bath.
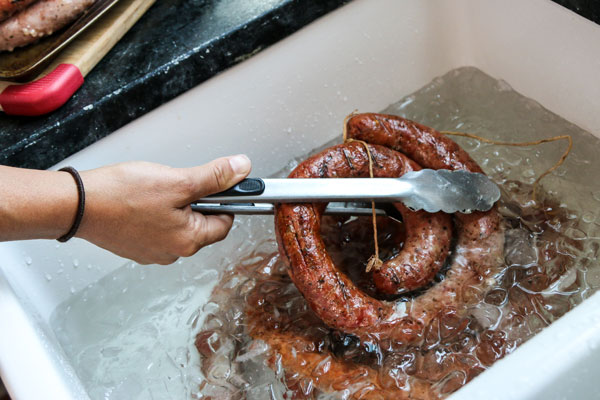
After they've cooled from the ice bath, pat the Kielbasas dry with paper towels. Wrap either in butcher paper or in plastic sealable freezer bags. Using a Sharpie, label each package Kielbasa: made May 6, 2015.
Place in the refrigerator for up to 2 weeks, or the freezer for up to 2 months.
You can eat the Kielbasas cold, but they are best served heated, either grilled or sautéed, with sides of Mustard and sauerkraut. Or level-up by making one tasty ass batch of Choucroute.